Friday 6 May 2011
Thursday 5 May 2011


Above are the original photographs I took and below are the photos after I have edited them in order to make my animation. I used iphoto to edit all of my photos instead of Adobe Photoshop as this is a much more officiant software to use when editing a large number of photos. This programme also allowed me to copy certain settings so that I was able to ensure all of my photographs still looked alike, something which is very important in stop motion.
I chose to have my images in black and white as I felt this had a much more metallic feel, another of my keys words that links very closely to this idea of my animation being robotic.


I have planned to start my animation with this first idea as I feel it will go well with the irregularity of notes and rhythm at the beginning of my music. In these few frames the actor remains in the same position facing forward, but moves suddenly to different positions on the screen seemingly randomly, much like the sudden changes in the music.

For this idea I will take photos of my model mid tuck jump in several different places. The model will continue to face to the right as he appears to float from the left to the right in the tuck jump position. In order to take these photos I will need to adjust the settings on my camera, so that I am able to take photos much more quickly but without lowering the quality.

This idea is very simple, my model remains in the same frontward facing position as he moves from one side of the screen to the other in only four movements. I have a very specific point in my music where I wish to put this clip, when four different notes follow one another in quick succession.

This idea is slightly more complex that the last, with the model moving diagonally across the screen while also spinning. Between each photo the model must not only move in the correct direction but also spin slightly.

For this idea I will simply take several photos of my model hanging off of the goal post in varying positions. These will then be edited to show an interesting movement, perhaps going part way across and then back and then all the way across, or perhaps in a totally random order, depending on the music at certain parts.

This idea is much like the tuck jump one, meaning that I must capture my model mid jump. However in these frames my model will be facing forward with their arms outstretched and legs straight, much like the image of an angel.

For this idea my model will simply stand in the centre on the shot and slowly spin, although a very simple movement I believe that when used in stop motion it becomes much more interesting, especially when used at a high speed.

This idea is much like my opening idea, with the model remaining in the same position facing forward. however, instead of moving in a random way the model will follow a curvy path thats leads slowly closer to the front of the shot.

This idea is very different to the others and will have a very different feel to it, for this reason I feel it will be used as an opening to my animation before the music has begun. Instead of the camera being on a tripod it will be handheld and will follow the model as they appear to float along a path.

I plan to use this idea to end my video, as this will allow the audience to get a close up of the models face for the first time throughout my animation. My model starts at a distance away from the camera, in the centre of the screen facing forward and moving steadily towards the camera, ending on a close up of the face.
Storyboards


For my final animation I have decided to do a stop motion of a model moving in a robotic manner. Each box of the storyboard shows a different idea which I hope to capture using stop motion, I am unsure which order all these different ideas will be used in my final animation, it will depended on the length of the clips and how they can fit in time with the music.
Robotic


Robotic was one of my three initial words when I first heard my piece of music. After doing further research into my initial thought I decided that following this idea/theme would make for a successful final animation. Many ideas sprung from the word 'Robotic' including an animation of a hand draw robot or perhaps one of simple shapes and lines that move in a robotic manner. However, in the end I decided to use stop animation or give a human robotic qualities. I decided to do this as it helps the audience to connect to the music as they feel more involved, and I was also very inspired by many stop motion videos that I watched so I felt that this technique would interest me throughout the project.
Monday 11 April 2011
Inspiration
This stop motion film has inspired me and helped me come up with an idea for my final video. At approximately 24 seconds someone moves around in very sudden movements which has given me the idea to use a character rather than objects. I will use the character in a way so that they represent the idea of a robot, I will do this by having them move in a certain way.
Cell Animation
This is a short animation which I created with my group Robin and Eve. We each very quickly designed a character that was simple to draw and we then had to create a storyboard using all three characters. My character is the cloud.

Here are some of the rough sketches that led to the design of my character.
 Further development of my character for my animation.

Organizing the Bookcase
This stop motion video is a great example of how stop motion can link in to the music and can also move in time with the music. It also shows how my using this techniques any everyday object can become interesting and can appear to have a personality.
Research
After deciding that I would like to use stop motion for my final moving image piece I began reasearching by looking at other examples of stop motion videos to try and get some ideas about what kind of thing I would like to do for my own video. While researching I came across an amazing blog that simply posts stop motion videos, so this blog was very useful for me.
Stop Motion
This is a short stop motion video which I created with my group in under 10 minutes as a way of learning about the camera and software used to create stop motion films. I really like the jumpy effect that stop motion gives and I feel this technique would work very well with my music as it too is jumpy and unpredictable. Robots also move in this very sudden and ridged way, so the techniques also links well to the ideas taken from my piece of music.
Rayograms
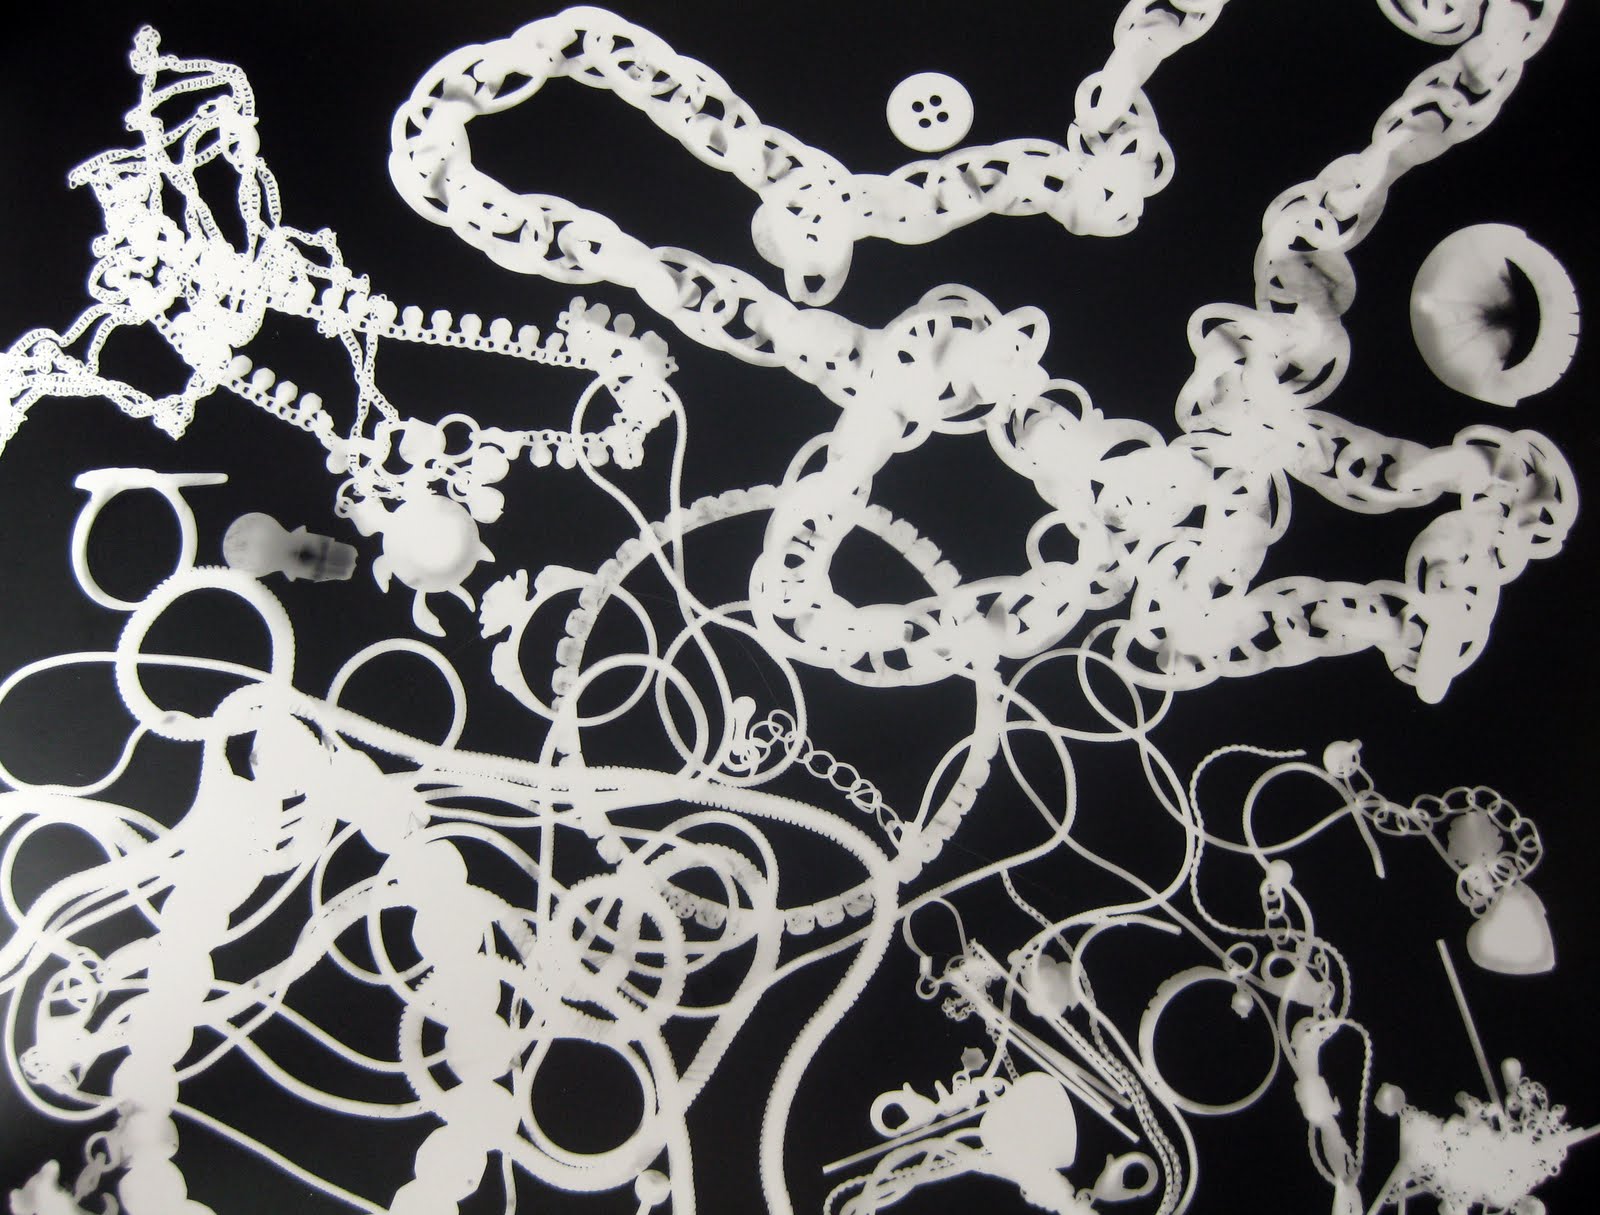
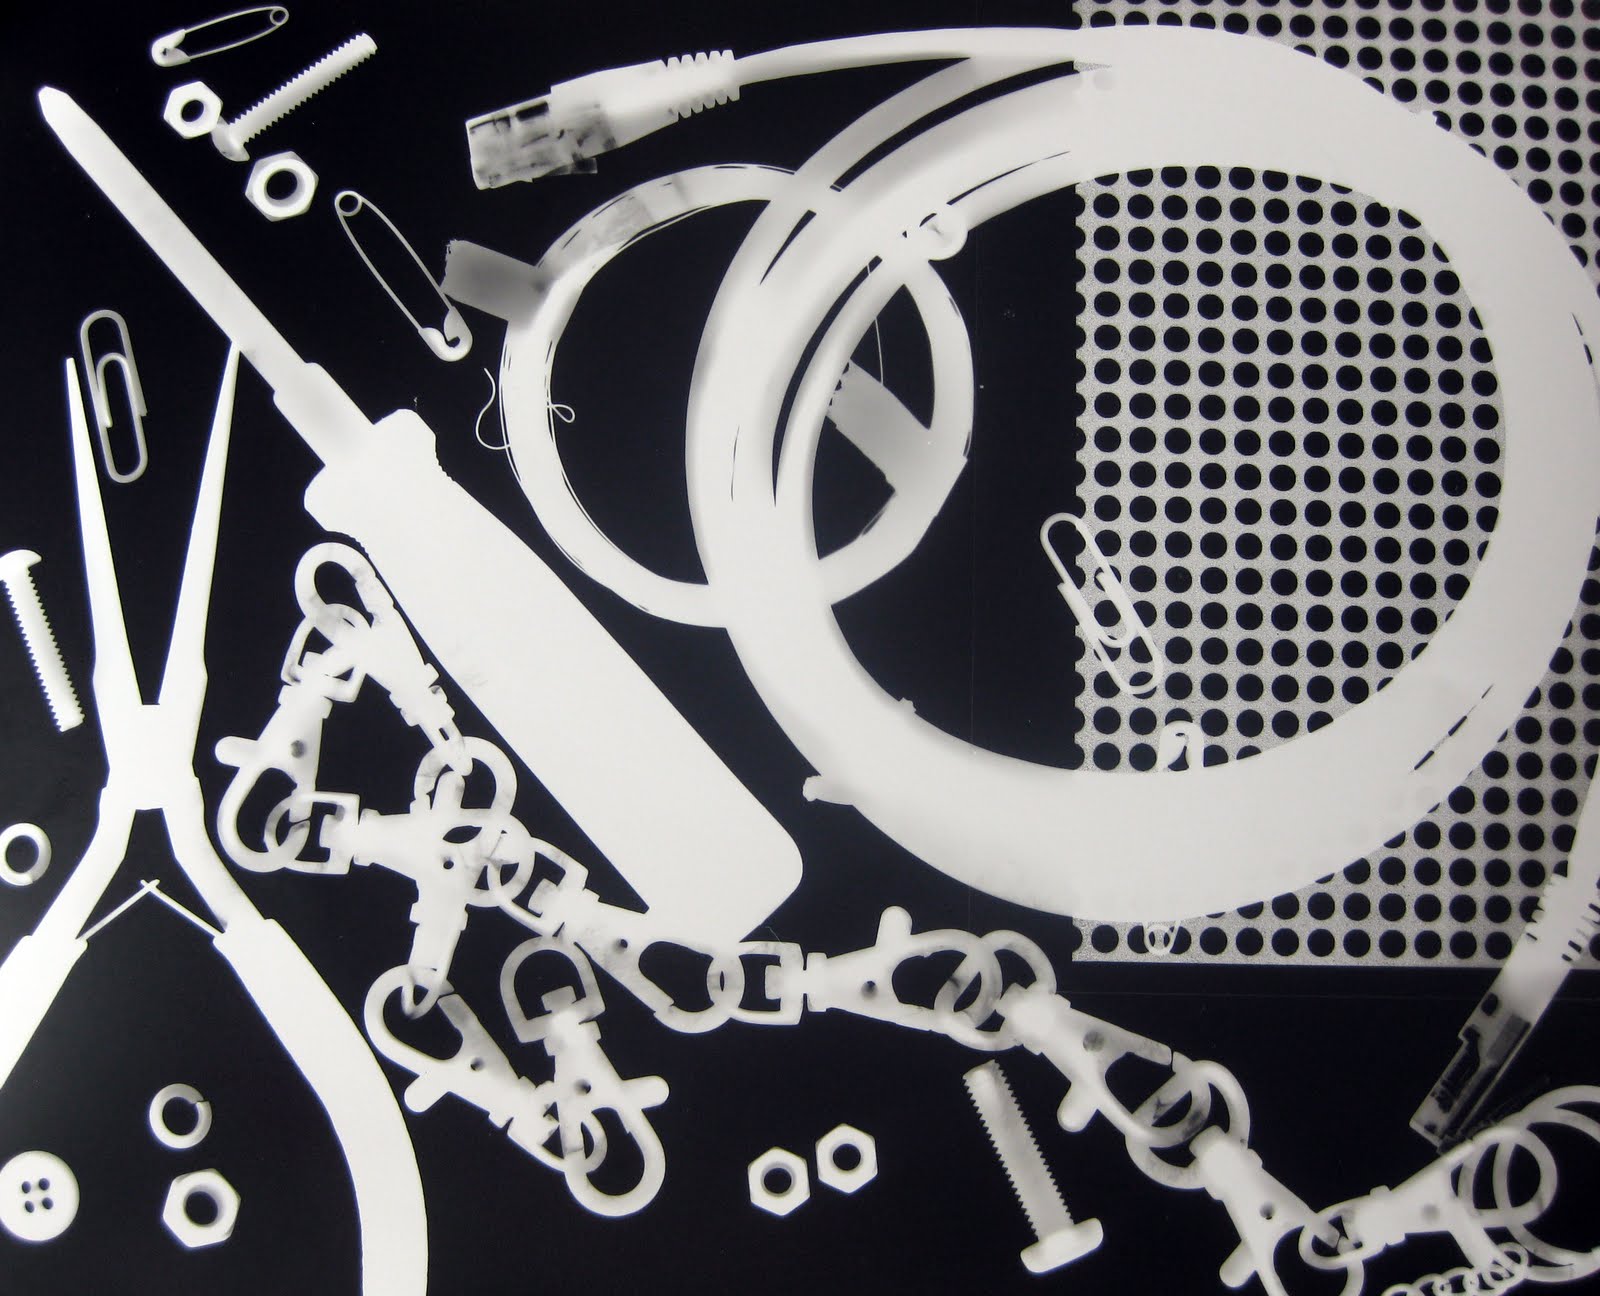

Here are some of the final rayograms I created. I was very pleased with how my rayograms turned out, I mostly used metal objects in my rayograms, reflecting the idea of robots that I took from my music. The nuts and bolts along with the cables reflect this idea well. I also used jewellery as this shows many different size and shaped chains, as my music sounds a lot like the clinking of metal much like the noise chains make.


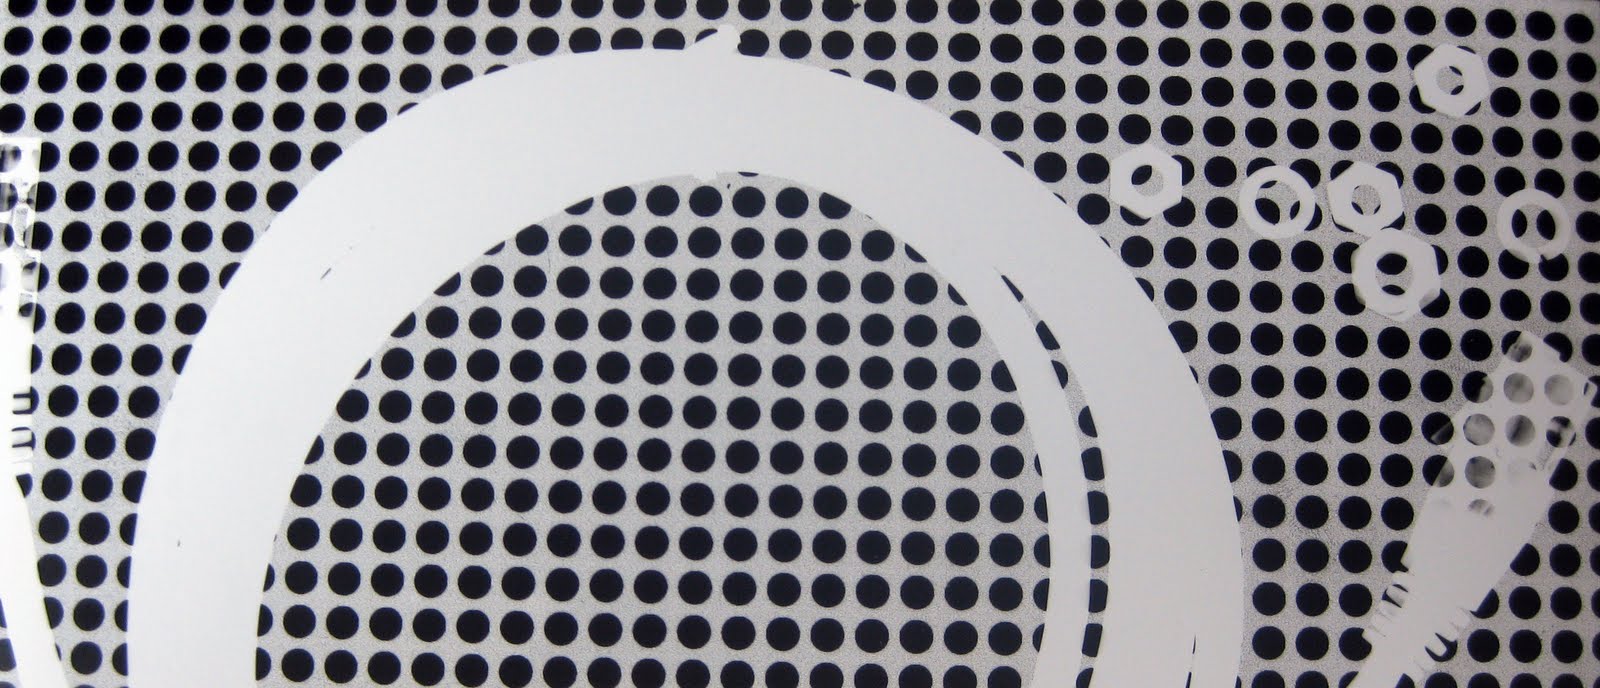
Here are some smaller rayograms I created, the interesting thing about these is the texture. To create these different textures I used a variety of objects, including bubble wrap, a scarf and a pattern that had been printed onto laminate. When using the bubble wrap I had to give the paper much less exposure time as the bubble wrap looks much more effective that way.

Above are some of my test strips from my workshop in the dark room learning how to create rayograms. It is important to do test strips to ensure that the paper receives enough light and the correct amount of exposure to create a successful image.
Print To Pixel
This is a video of the piece of music that I have to use when creating my moving image. The music starts with quite a steady beat, however after about 20 seconds it starts to become very disjointed and much harder for the listener to interpret what will happen next. Because of this I think I will use the very beginning of the piece, however when producing my video I may change my mind if there is a certain part of the piece that fits better with my moving image.
When I hear this piece I think of robots and of science fiction, as it has a technological and almost futuristic sound. I think this is because it sounds very unlike anything you would usually hear. There are certain parts of the piece that sounds very like a dial tone, perhaps suggesting the idea of connecting to something robotic or out of space.The piece also reminds me of rain falling, especially at the beginning of the piece. I can visualise the rain falling in different places and on different objects to make the variety of different sounds that are heard. This could perhaps be turned around with a variety of different objects falling instead.
Monday 28 March 2011
Final Poster
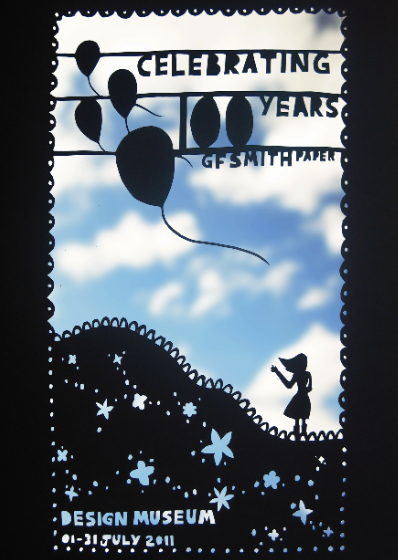
I was pleased with how my final poster turned out. Although it is nothing compared to Rob Ryan's incredible work it does reflect some similar techniques and style. It also clearly reflects the celebration of GF Smith Paper so the aim of the brief has been successful.
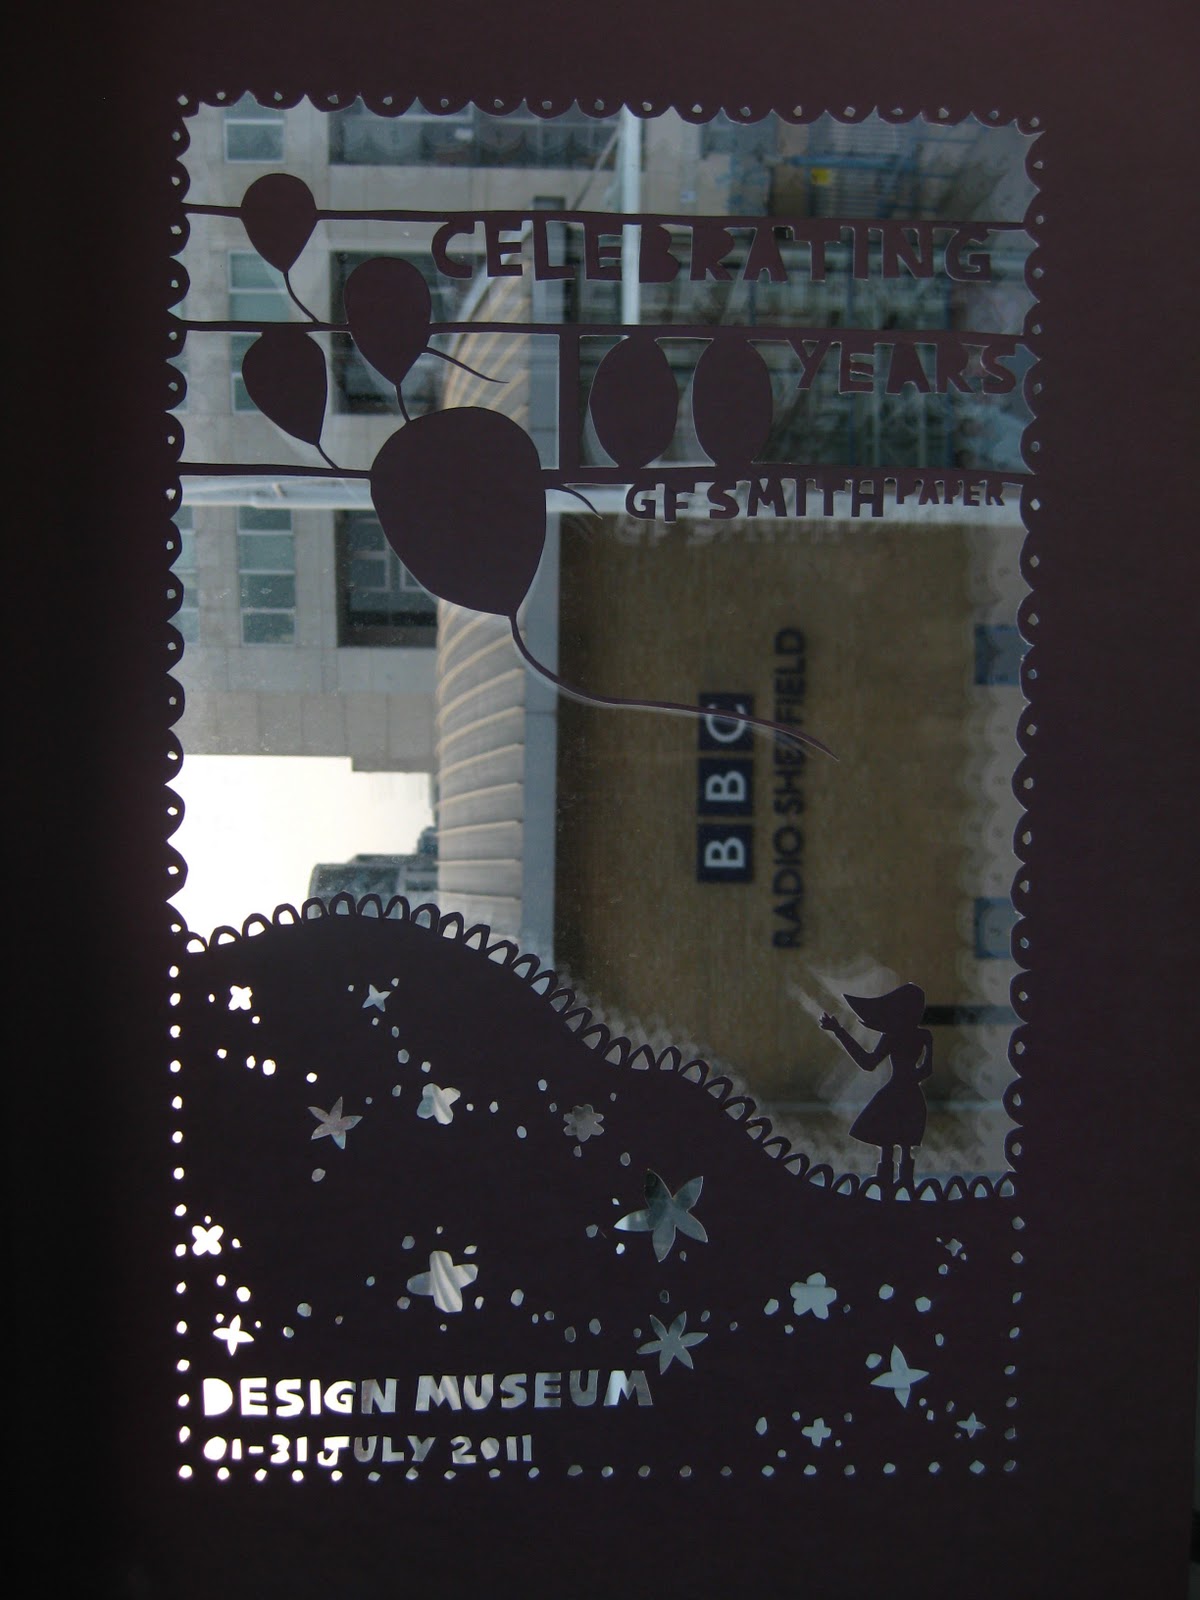
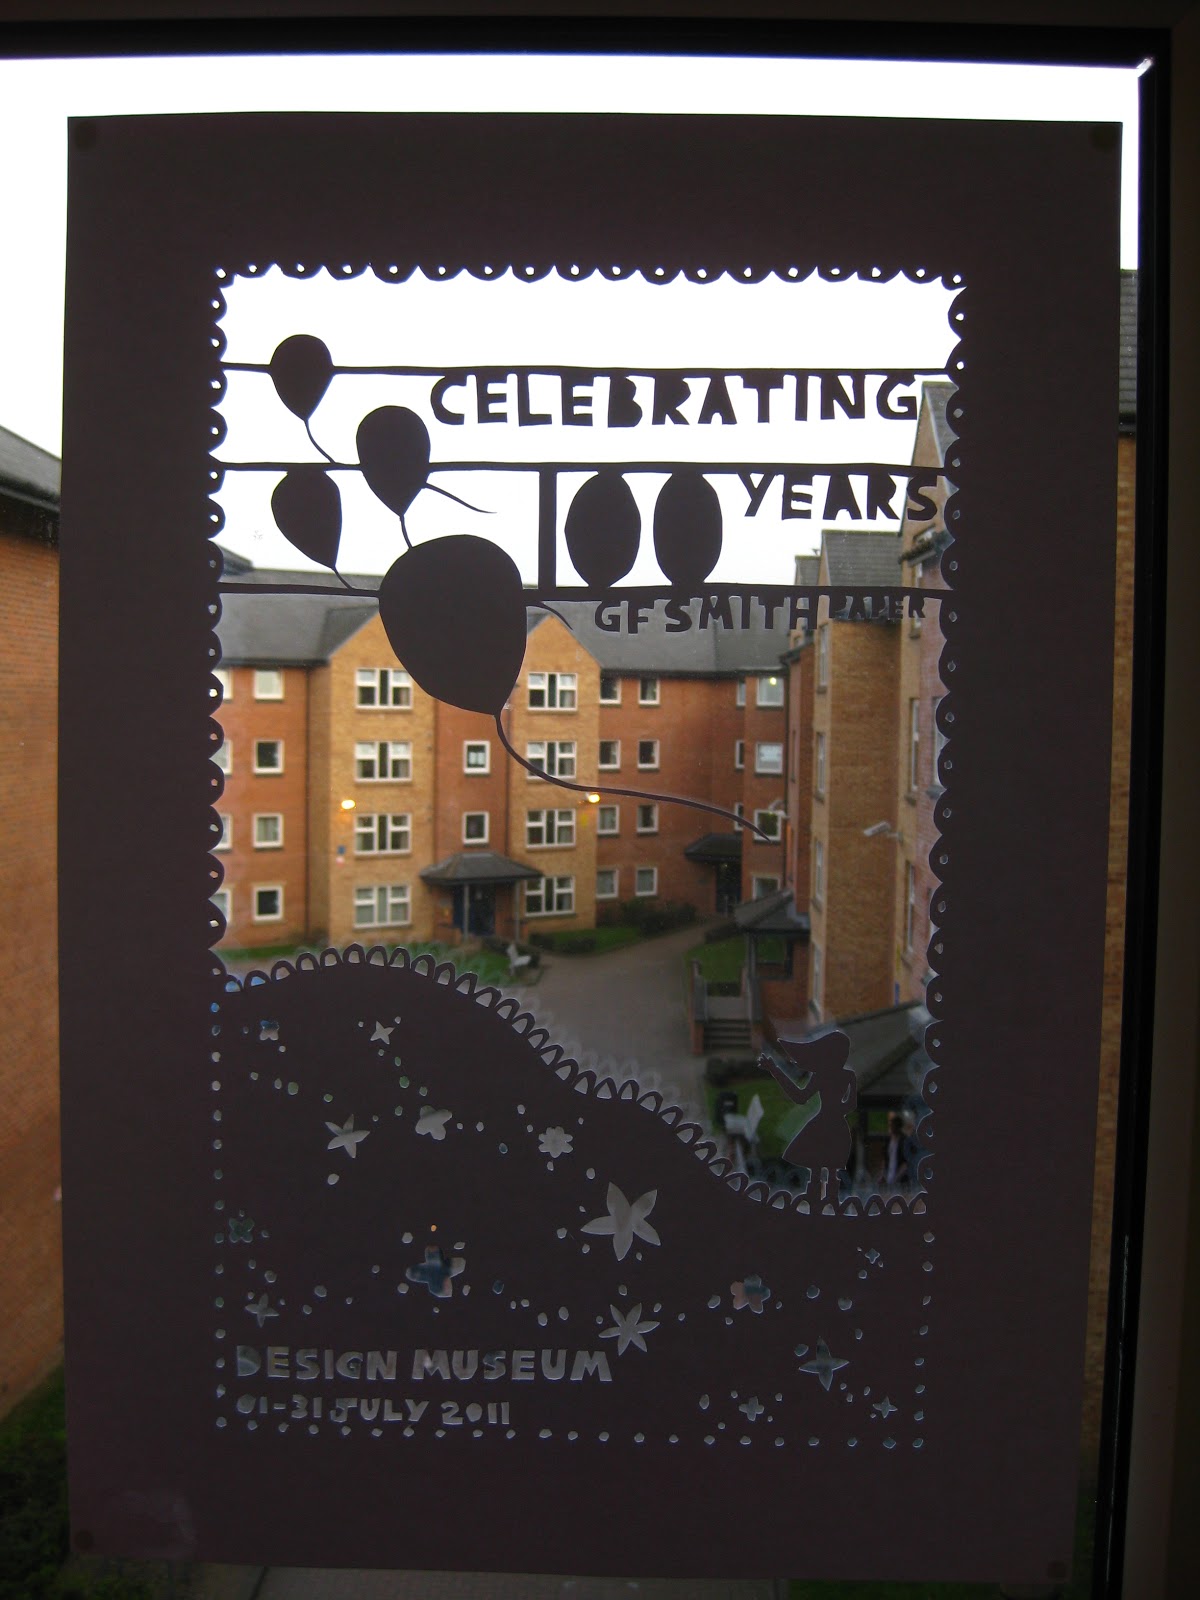
These were some photos I took when testing out different locations and views from windows.
Below is the image I used to create my final poster. Unlike the other two it was taken in the morning when there was more sunlight and this is why my cut out turned into a black silhouette. This is the effect I was trying to achieve so I am glad this happened.


When creating my final poster I learnt from the near mistakes with my sculpture and made sure I has happy with the design and had drawn it all out before starting to cut out the image.

Cutting out my poster was a lot harder than the design for my sculpture, as it was a much smaller and more intricate design. It also had a lot of text which had to be very precise unlike in the design for my sculpture. It took me a lot longer to make the poster, almost double the time.

Rob Ryan


Rob Ryan is an amazing designer who is famous for his incredible paper cut outs. I researched him at the beginning of the project, and there are some similarities between his work and my final sculpture. However it was when I came to create my final poster that I was truly inspired by Rob Ryan's work, helping me come to my final design. I decided that I wanted to create my own paper cut out, based on the style of Rob Ryan but obviously focusing on the brief and '100 Years of GF Smith Paper'. By using this technique I knew I would be able to create a poster that was relevant to my brief, rather than a photograph of a paper sculpture with some text next to it. By doing it this way I would be able to combine the two. The images above are a few of many of Rob's designs that inspired me and helped me to create my own design.
Final Sculpture


I am very pleased with my final sculpture as I successfully created my design and the effect I had hoped to, despite my fears that after cutting out my image the paper would not be able to be manipulated into a 3D sculpture. I was unsure as to whether my design would work in practice, but I was gladly surprised at how well it turned out. I really like the way certain parts of the sculpture breakaway from the spiral shape as they have been cut in a certain way so that parts of them are not connected and have the freedom to not have to bend in connection with the rest of the paper. If I were to make the sculpture again I would add more intricate detail and perhaps have a wider variety of small illustrations rather than such large ones. I would also like to experiment with a square piece of paper as I feel the symmetry of the shape would make shaping the final design into a 3D sculpture much easier.
Creating Final Sculpture
When creating my final poster I was sure to consider William Morris' work, to ensure that my image flowed well and looked like one whole image rather than a series of individual illustrations. I also worked hard to make sure that a large percentage of the border was connected to part of the image to ensure that my final sculpture would be structurally stable.

I started with just drawing part of my final image, and then cutting this out as I wanted to ensure that the design was working as I had planned. It was at this point that I learned to take great care with what I was cutting and not to cut too much as this may hinder the connections within my image and therefore make my sculpture weaker.

I then made sure I had drawn the majority of my design before continuing to cut unwanted parts out. In this image you can see that I have begun adding some detail to the left of the sculpture. I have cut small slits to show the edges of some of the shapes thats overlap with other, for example the flower in the centre on the left which overlaps with a leaf. I also cut out larger areas, particularly on the smaller flowers where I have cut a large part of the petals out of overlapping shapes. I am really glad I did this as it creates a very interesting effect, with the contrast between the paper and the blank space.
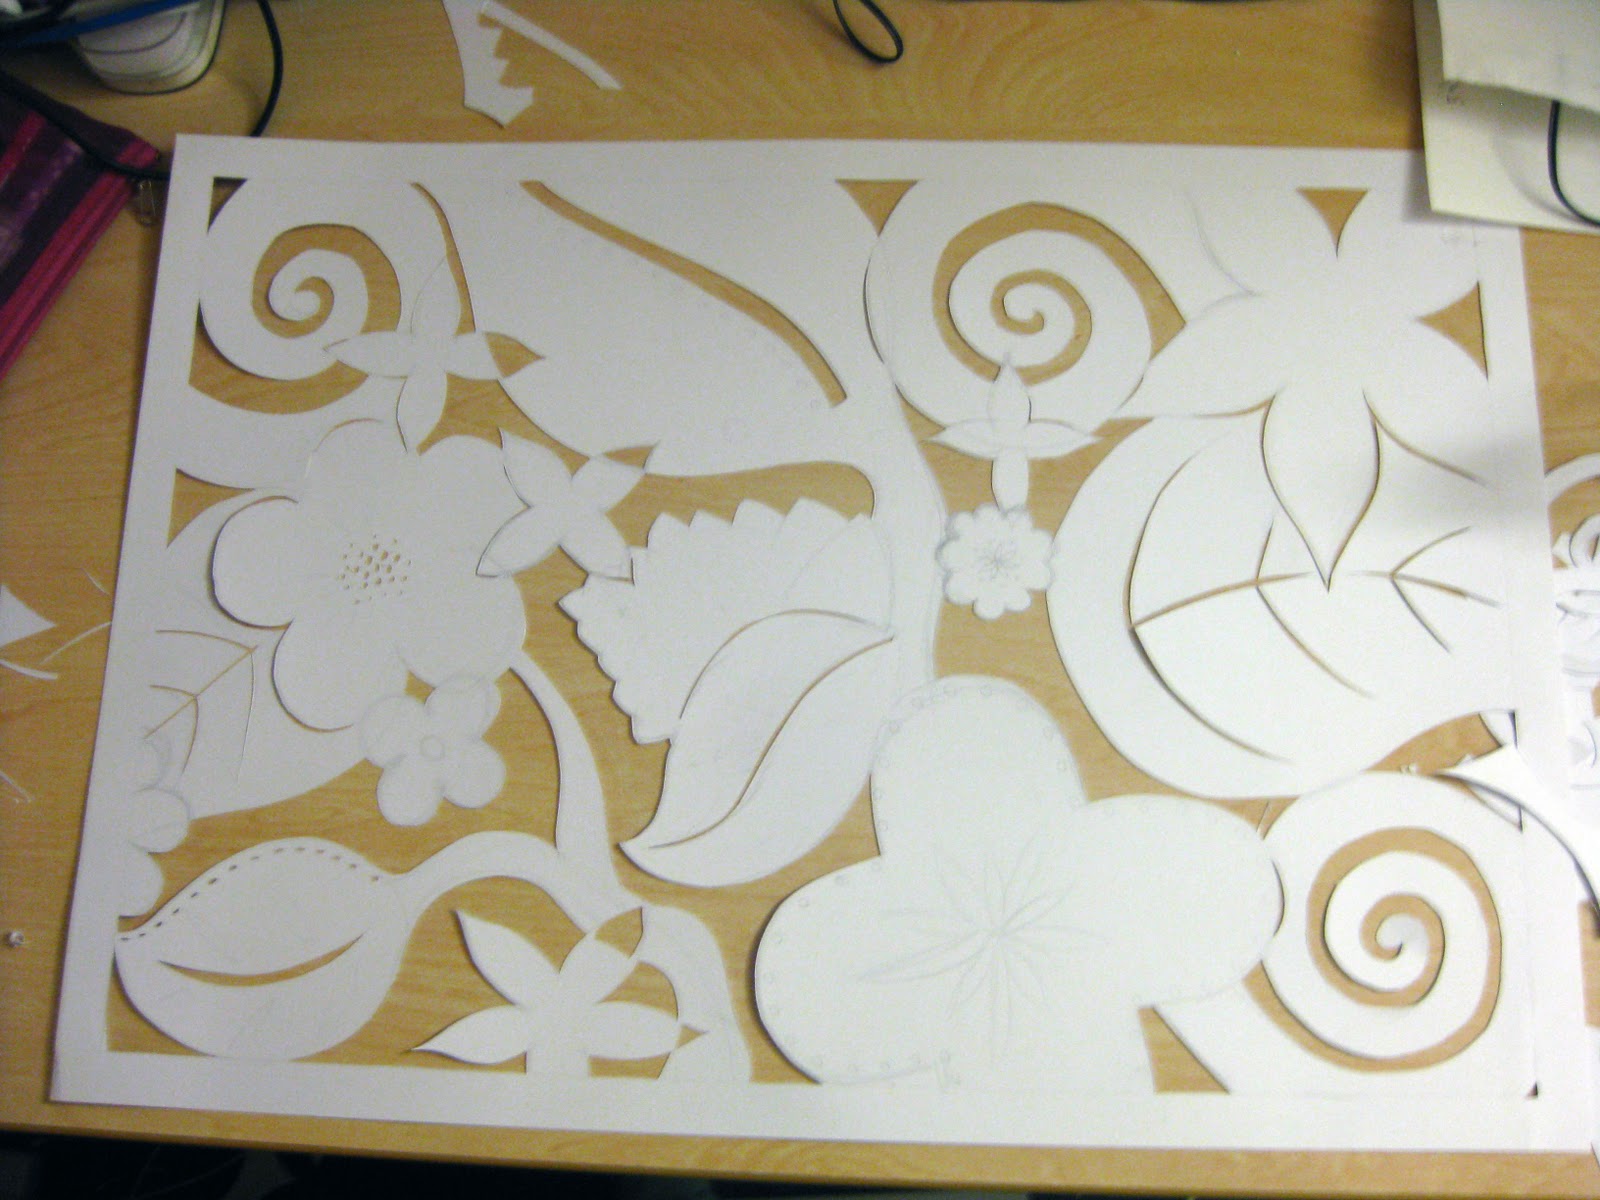
When I had cut out the entirety of my design I was able to make sure that it was structurally stable and that there were enough connections made both within the image and to the border around the image. Now that the basic shapes had been cut out I was able to add more detail to create my final design shown in the image below.

Thursday 24 March 2011
William Morris

William Morris is famous for his intricate floral patterns, with the images flowing together with no clear beginning or end. When designing my final sculpture I need to ensure that my image embodies these techniques as it is vital that a large percentage of the image is connected to the surrounding border. This will ensure that my sculpture is stable, and that it is able to be manipulated into various shapes and positions, rather than simply falling to pieces.

Subscribe to:
Posts (Atom)